Sunday, January 5, 2014

January Bird Watch

Today we had a heat wave come through, so we got outside to do a bit of yardwork.  Turns out that the wildlife was really enjoying the weather too.  I saw numerous birds in the yard that I don't often see around.

 Eastern Bluebird


House Finch


And the ones that I was most excited about - the Cedar Waxwings.  I've always seen these beauties in the bird books, but never saw one for myself until today.  I think their markings are so exquisite.  There weren't just a few of them either - there was an entire group of them, also known as an "ear-full" or "museum."


 A museum of waxwings...sprinkled with a few white-winged doves.


So pretty.


A waxing, bluebird, and red-bellied woodpecker all in one pic!  I really felt like our yard was a menagerie for wildlife today!


Sunday, December 8, 2013

Merry Amaryllis

I planted a red amaryllis indoors in early November in hopes for some beautiful indoor blooms in December.  I was not disappointed.  The amaryllis blossomed in late November, so we were able to enjoy the blossoms for Thanksgiving and into the first week of December.  What a beauty.

Starting to blossom in mid-November

 Full blooms in December

Sunday, December 1, 2013

December Bird Watch

At the end of October, I finally got around to thoroughly cleaning and refilling my bird feeders, which have been sitting empty since the end of last winter.  I made sure to get all the old moldy seeds out of the Droll Yankee Squirrel Flipper and my Perky Pet Copper feeder, let them completely dry, and then filled them with some general bird feed mix from Target. Then, I waited for my birds.

After about two weeks, I still had seen no birds and was getting discouraged that I had lost all the flocks that I catered to from last winter.  We had a lot of rain in the Austin area at the end of October and early November, so I checked my feeders again.  Sure enough, the mold was back from all the wetness and from not being eaten.  So, I went through the process again of cleaning out my feeders.

Finally, after a break in the weather, about three weeks after putting my feeders out, the birds finally returned.  Hurray!

I got to enjoy watching my birds over the long Thanksgiving weekend.  The birds will feed throughout the day, but the highest traffic hours are around 7:30-8am and 3:30-4pm.

Here are some of the birds that were in the garden today:


Here is a host of house sparrows that live in a large bush on the side of our house.  This is definitely our most prominent bird here in suburban Central Texas.  I have counted about 20-25 feeding and sitting around at one time.  The males have the black on their throats.  Apparently, this is the male's fall mating plumage. 


Female house sparrows eating on the copper feeder, near the covered porch, and closest to their nesting bush.


Here is one of my favorite visitors right now - my woodpecker, pecking away at the suet.  I'm pretty sure this is a female ladder-backed woodpecker.  The males have a red crown, while the female's is black. She certainly doesn't like to share.  Some of the sparrows have tried to get some of the suet while she is eating, which is a big no-no.  She viciously pecks at them until they fly away.More sparrows adorn the Droll Yankee Flipper. 


Here we have a dule of white-winged doves.  They are my second largest species that visits, with around 15-20 birds that I've seen in my yard at one time.


A couple days ago, when we were having a cold spell (30-40 degrees), I saw these three little Inca Doves huddled up on the window ledge, probably trying to capture some of the escaping heat from the house.

Other birds that I've seen in the yard in the past week:
-House Finches (2-3 total)
-Carolina Chickadee (only 1 little guy so far)
-Blue Jays (2)
-Hawk (1) - I didn't get a very good look at the markings, so I'm not sure what kind of hawk it was, but it was probably 12-16 inches long when I saw it sitting on our back fence.

I hope to get some Northern Cardinals, Goldfinches, and Titmice in not too long!  A few more Chickadees would be nice too.

Celery Magic

I read multiple times online that if you cut off the bottom couple inches of a bunch of celery and place it in some water, it will start to grow and you will shortly have your own celery plant.  I decided to give it a try.

Low and behold, within a few days, I started to see growth in the middle of the plant.  I added a few more celery stalks to my collection after I saw it actually worked.


I also tried this with romaine lettuce and got the same result.  


After a few weeks, the plants were large enough to plant outside in the veggie bed.  I dug a hole large enough to cover the old stalk and only had the new growth above ground, then watered thoroughly.  I then waited patiently to see how much more the plants would grow.


Unfortunately, they never did grow large enough for me to harvest any more celery.  I think part of the challenge might have been that I did this in winter, so I'll have to try it again in the spring to see if I get a different result.

Sunday, November 10, 2013

Bermudagrass Nightmare

It has been quite awhile since my last blog post - over a year.  I'm hoping to get back in the swing of things and have much more frequent posts on my Texas Garden.

This summer in Texas was a brutal one.  Between the heat, drought, and my multiple travel excursions for work and play (California, Minnesota, Brazil, Turkey, Bulgaria, Poland and the UK), my garden was extremely neglected.  On top of that, one of the worst possible things happened while I turned a blind eye to my veggie beds - BERMUDAGRASS INVASION!

You can barely even see the outline of the veggie beds, or where the mulch path use to be.


Bermudagrass is a common grass grown here in Central Texas, because it is so invasive and will fill every part of your lawn by multiplying through seeds and the extensive underground root system and rhizomes. It does well on limited water, poor soil, and in intense heat, making it perfect for the Central Texas growing conditions.  However, I did not do a very good maintenance job, and once the Bermudagrass found it's way into my nutrient-rich raised vegetable beds, there was no stopping it from a complete takeover.

I did try multiple times during the summer to till and weed the Bermuda grass up in the beds, only to have it grow back with more vengeance. After a couple of tries, each taking 4 hours or more, I gave up on trying to maintain the grass by just tilling and weeding.

You will notice that the two veggie beds that get full sun have the worst Bermudagrass invasion, since Bermudagrass thrives in the full-sun, but doesn't do as well in the partial to full shade.


Finally, as part of my birthday present in October, my thoughtful husband decided to help me tackle the mess.  With some insight from his colleague, who does some landscaping on the side, he first pulled up all the mulch and weed block that had been laid down around the beds.  This was originally put down to BLOCK the Bermudagrass and other weeds from the beds.  However, I have now learned that mulch does not stop Bermudagrass.  If anything, it actually acts as a perfect place for the grass to take root and grow.


Next, he tilled up all the roots in the beds as well as all the roots that had grown UNDER the weed block around the beds and pulled up and threw away as much as possible.

Then, he laid down several yards of crushed gravel around the beds.  His friend informed him that it will be much more difficult for the grass to grow over or under the crushed gravel than it was with the mulch.  This gravel will then be packed down by tampering the crushed stone and we will later put some more decorate stones or pebbles on top.


There will then be more work in store for me next spring and summer to maintain the Bermudagrass from getting out of hand again.  Fall and winter is the dormant season for the grass, so I will need to wait until the growing season next year to fully get rid of the remaining rhizomes and seeds that still remain in the beds.  Other than tilling and weeding, I plan to try solarization (using plastic sheets to mulch the beds and kill the seeds and roots with high solar radiation).  If that doesn't do the full trick, I might need to take an inorganic approach and spray the beds thoroughly with an herbicide like Round Up.  I will try to exhaust all organic methods first.

Here's to hoping the new gravel borders, tilling, and eventual solarization works to KILL THE BERMUDAGRASS!!

Sunday, July 15, 2012

More Rain and Today's Harvest

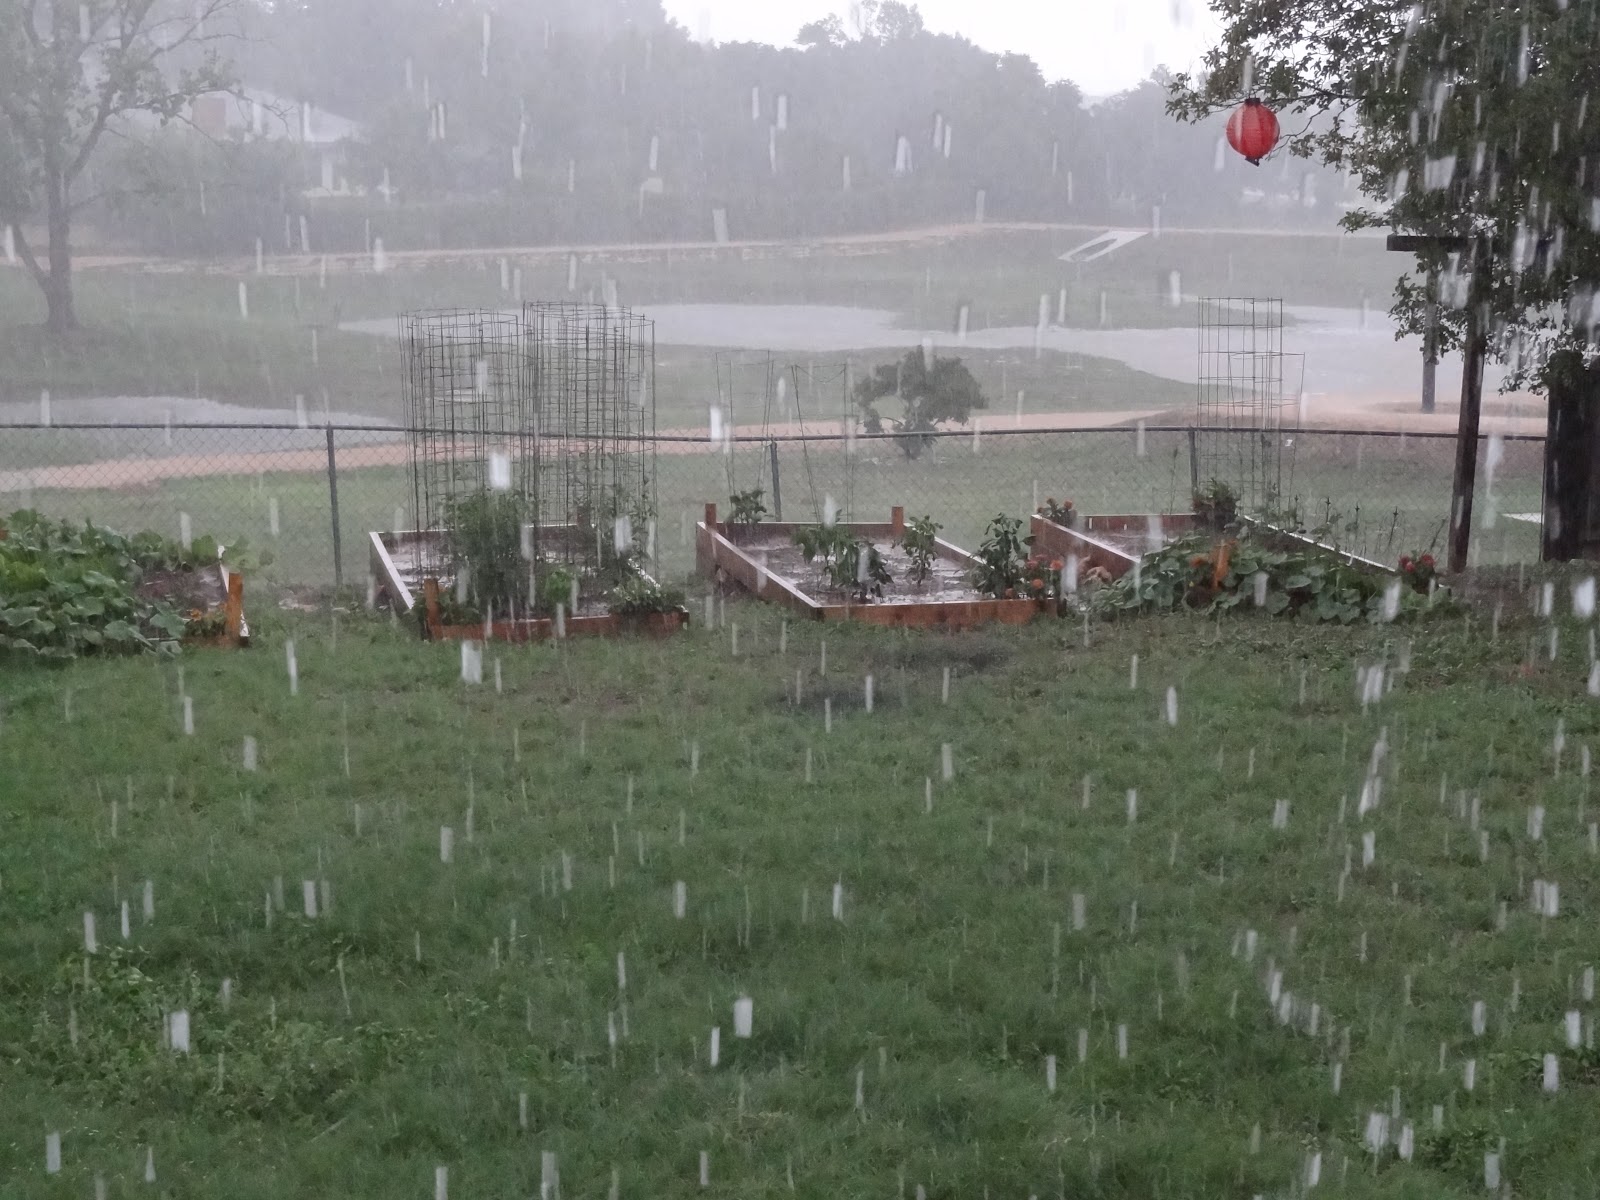
It has been about seven straight days of rain here in Central Texas, and the garden is loving it - not to mention all the wildlife around here that is enjoying the wet weather and break from the Texas heat.  It has rained so much that there is now a pond in the park behind our house!  It is actually a retention pond for instances such as this, but most of the year it is completely dry.


The wet weather has really been making the garden grow.  Today I harvested a large bunch of basil that I have growing next to my tomatoes.  I cut the basil back, but left enough of the stems so that it will grow back and I can harvest it again in a couple of weeks.  Now is time to make a little pesto to put in pastas and on chicken sandwiches. 

I also pulled one radish from the garden today.  It looked picture perfect, but wasn't the best tasting in my opinion.  It was definitely fresh enough, just too-radishy.  I think I had them in the garden a little too long, so they got overwhelmingly flavorful.  I also planted radish during the Texas summer, which is not the suggested season for them.  They prefer the cooler spring and fall months.  I think the heat made them extra potent and a bit too much for me.  I'll be planting radishes only in the spring and fall now.


I was able to plant some seeds indoors on my new grow shelves as well.  Yesterday I planted:

  • Fruit/Veggies
    • Eggplant - Early Long Purple (Martha Stuart Organic)
    • Eggplant - Black Beauty (Ferry-Morse)
    • Watermelon - Tasty Sweet (Burpee)
    • Pablano Pepper (Ferry-Morse)
    • Pepper - California Wonder 300 TMR (Ferry-Morse)
    • Tomato - Supersweet 100 VF Hybrid (Ferry-Morse)
    • Swiss Chard - Fordhook Giant (Burpee)
    • Swiss Chard - Ruby Red (Burpee)
  • Herbs
    • Sweet Basil (Burpee)
    • Spanish Cilantro (Burpee)
  • Flowers
    • Marigold - Best Mix (Burpee)
    • Morning Glory - Tall Mix (Burpee)
    • Lupine - Russell's Hybrid Mixed Colors (Ferry-Morse)
    • Painted Daisy - Giant Mixed Colors (Burpee)
Note - I soaked the morning glory and lupine seeds for about 18 hours before planting to soften the hard seed shells to hasten germination.

Saturday, July 14, 2012

Indoor Grow Shelves

My most recent garden project was setting up indoor grow shelves.  These shelves will come in handy for starting my garden seeds inside when it is either too cold outside (January), or when it is too hot outside, like right now.  I tried several times to get some tomato, pepper and eggplants to grow from seeds outside, but I think it was too hot for them because the seedlings kept wilting.


I also tried starting watermelons and cucumbers from seeds multiple times.  The heat didn't bother them, but I noticed that bugs were chewing through the delicate cucumber stem and that the mockingbirds were pulling my watermelon sprouts right out of the ground.  The grow shelves should help me get the plants established before putting them outside.


To set up my grow shelf, I bought:
  • Whitmor 4-tier metal shelving unit ($65)
  • 3 4-foot 2-light T8 fluorescent shop light fixtures ($60)
  • 6 4-foot T8 fluorescent light bulbs ($30)
    • 4 Philips Daylight Deluxe (32 watt, 2750 lumens, color temp 6500K)
    • 2 Philips Soft White (32 watt, 2950 lumens, color temp 3000K)
The daylight bulbs produce blue light, which are needed for the seedlings to grow.  The soft white produces red spectrum light, which the plants need for flowering.  Blue light is more important for starting seedling indoors that will later be transplanted outside, but I read that having a full spectrum of light (blue and red) is good for the seedlings.  I'm trying a little experiment and I have one of the shelves with only daylight (blue) lights.  The other two shelves have one daylight (blue) and one soft white (red) lights.  I'll see which one the seedlings tend to do better under and will adjust my lights accordingly to use the best light for my plants.