Showing posts with label Bulbs. Show all posts

Saturday, February 14, 2015

Happy Valentine's Day

Happy Valentine's Day!  I hope your day is filled with LOVE.


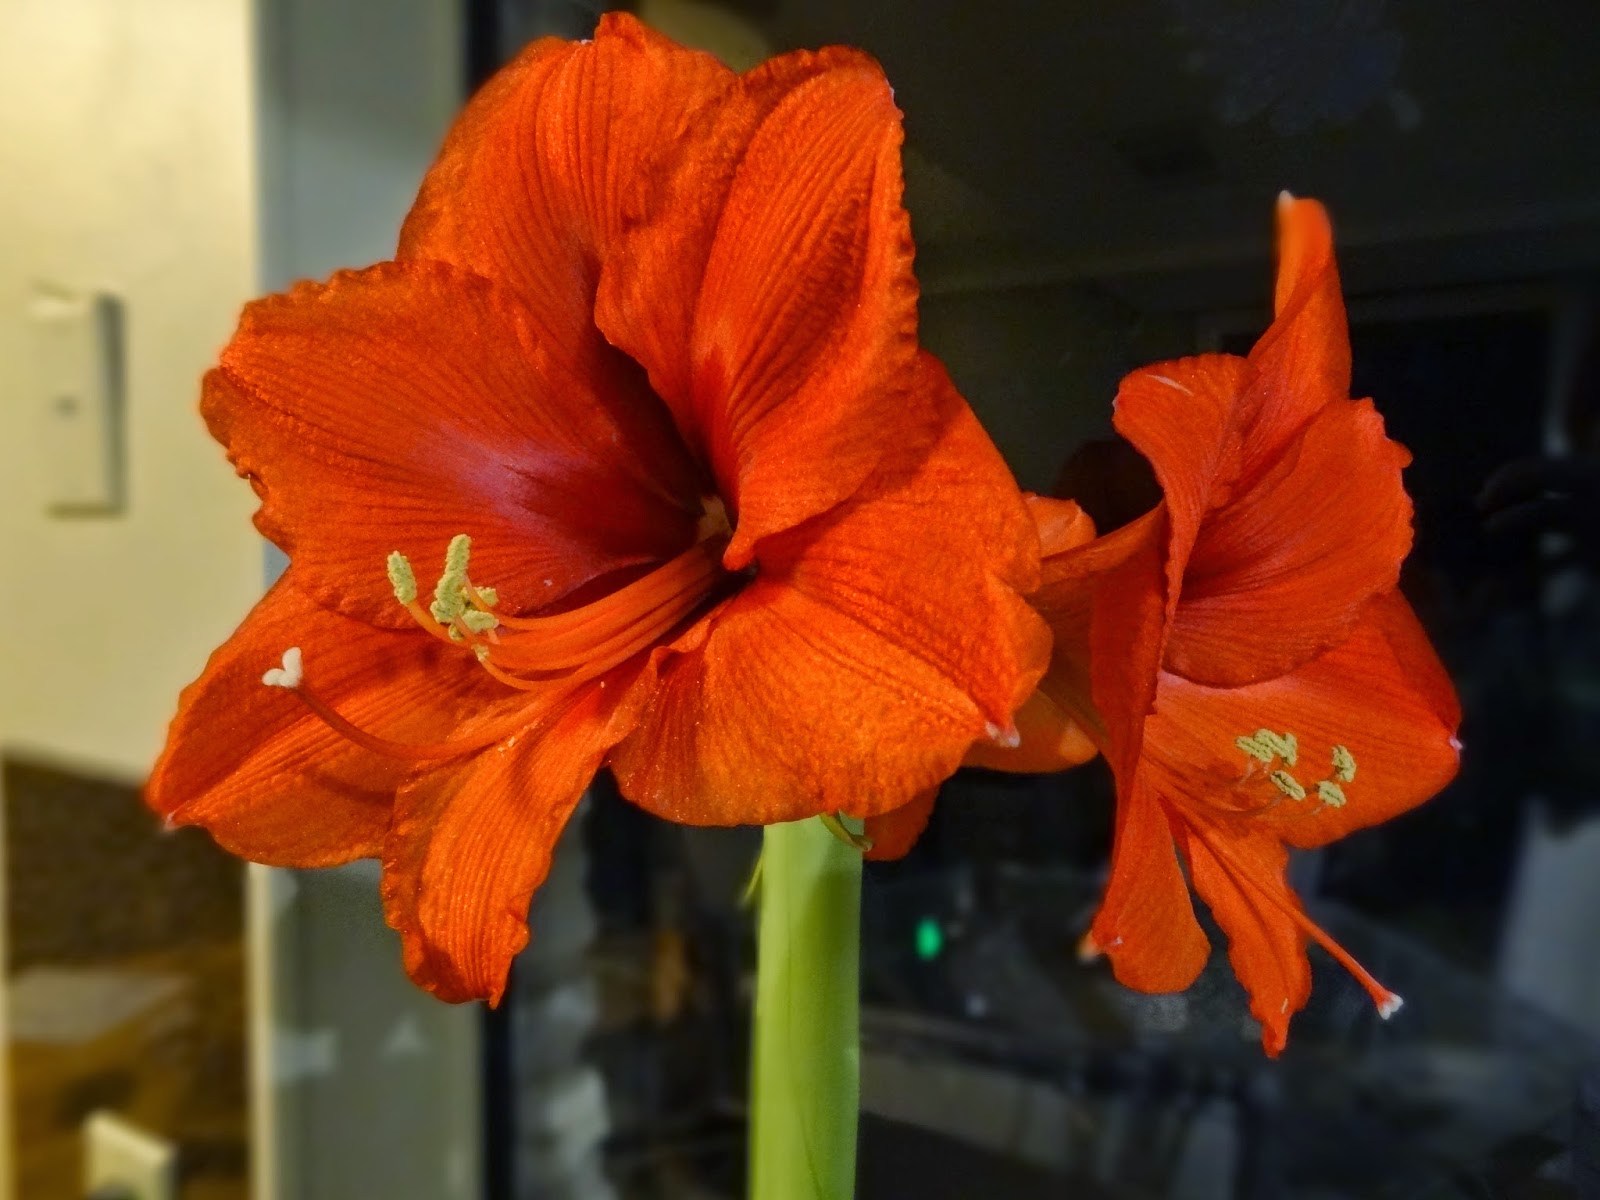
Pictured here is my Minerva amaryllis bulb.  She stopped flowering at the end of earlier this month, but I had to show her off all the same.

I had purchased the amaryllis bulb from a big box store last fall and completely forgot about it sitting in a constrained plastic bag until it was nearly too late.

I put her in a pot anyways in mid-December and gave her some LOVE (ok, maybe it was more the sunlight and water that did the trick...but the LOVE didn't hurt).  And this is what the poor thing looked like after a week or two in the pot...pathetic.


I thought for sure that was all I was going to get and that I'd just have to wait for next year to try Minerva again.  But to my surprise, after the first flower stalk died, she shot up another stalk (straight up this time), Not only that, but the new stalk bloomed TWICE.  The first set of flowers lasted about two weeks, and then the second set of flowers lasted about two weeks, giving me almost a full month to enjoy her beautiful blooms.

That settles it, Minerva is my new favorite amaryllis.  Don't get me wrong, Red Lion was definitely a showstopper for Christmas, but the blooms only last a week or so.  I really LOVE how Minerva keeps going...and going...and going.  You really get the biggest bang for your buck.


Now the question is, do I plant my Minerva and Red Lion bulbs from this year out in the garden beds, or store them away and force them inside again next winter?  Knowing me... I'll place them in the garden AND buy more bulbs next year to force indoors.  I do LOVE my amaryllises!

Saturday, December 20, 2014

Holiday Amaryllis & Paperwhites

It has become a tradition of mine to force amaryllis and paperwhite bulbs each fall for beautiful indoor blooms for the holidays.


How to force amaryllis bulbs indoors:
  1. Mix a little bit of water in with potting soil so the soil is slightly damp but not wet to the touch
  2. Place the amaryllis bulb in the dampened soil, making sure the neck of the bulb (top 1-2 inches of round part of the bulb) is above the soil line
  3. Place near a window that receives indirect sunlight and stays around 65 degrees
  4. Wait 3-4 weeks for blooms, watering only lightly when the soil becomes completely dry.


How to force paperwhites:
  1. Place bulbs in containers atop stones, gravel, or glass marbles or pebbles.  I like placing mine in a tall, clear wide vase because it is interesting to see the root systems develop through the planting medium and is also easy to tell how much water is in the container.
  2. Anchor bulbs in place by placing another ½ inch to inch of stones on top of the bulbs so they don’t move
  3. Fill container with water, but only up to the very bottom of the bulb.  If the bulb sits in too much water, it will rot.
  4. Wait 4-6 weeks for blooms, watering enough to keep the root systems in the water.
  5. Stake the paperwhites when they become too tall and start topping over.  I like to use a ribbon to tie all the leaves together – it gives the plant a nice festive holiday look.

This year, I planted one Red Lion amaryllis and about ten paperwhites in early November.  The Red Lion amaryllis bloomed quickly and I was able to appreciate its deep red blooms during Thanksgiving. 


The paperwhites took a little longer to blossom, waiting until the second week of December to put on their show.  However, they keep their blooms much longer than the amaryllis, about 2-3 weeks compared to about a week for the amaryllis.  The paperwhites also have a strong fragrance, white the amaryllis has almost none.


In early December I planted another amaryllis bulb, Minerva, that I had forgotten about that had started to grow cock-eyed in the plastic big box bag it had come in. I thought the stem may correct itself after getting in a proper pot and better sunlight, but it never did rebound fully and the blooms only half-blossomed.  I’m hopeful that the bulb is still storing up enough energy so that I can try again to get beautiful blooms next year.


I plan to plant my bulbs out in my garden after they are finished blooming indoors.  To plant amaryllis and paperwhites outdoors (instructions from easytogrowbulbs.com):
  1. Find a location where the soil drains well. If there are still water puddles 5-6 hours after a hard rain, scout out another site. Or amend the soil with the addition of organic material to raise the level 2-3" to improve the drainage. Peat moss, compost, ground bark or decomposed manure all work well and are widely available. Amaryllis must not sit in soggy soil or the bulbs will rot.
  2. Site your amaryllis where they will receive full sun. Amaryllis will grow in light shade but tend to develop stronger stems and better proportions in brighter light.
  3. Dig holes and plant the bulbs with an inch of the bulb above the soil surface. This is sometimes referred to as planting "up to the shoulders" of the bulb.  The top of the bulb is the part that looks a little like the stem area of an onion and the bottom has a flat plate, often with a few roots attached.
  4. After planting, water well, gently soaking the soil and settling it around the bulb. Then ease off on the water; your bulb doesn't need moisture when there isn't yet growth to support. Amaryllis may be planted from September through April in warm weather climates. While occasionally flower stalks will develop in the fall, easpecially during the first season, mid spring is the typical time for flowering.
  5. When in bloom, feel free to cut amaryllis flowers for fabulous bouquets. Amaryllis aren't used widely in the U.S. for cuts but they are very popular in Europe. Pretend you're in Paris!
  6. After blooming has finished for the season snip off the old flower stalks but leave the foliage in place; don't cut it off. The leaves will gather sunlight, create food through photosynthesis and strengthen the bulb for the future. Water as needed during active growth periods, about 1/2-1" of moisture per week is a good estimate. In warm regions amaryllis foliage is evergreen and continues to look good year round.
  7. In zone 8, mulch your plants in late fall with a 3" layer of leaves or pine needles to reduce the chances of the bulbs being subjected to ongoing freeze and thaw cycles as these are hard on amaryllis. Remove the mulch in the spring to prevent moisture from being held against the top of the bulbs.


Tuesday, October 14, 2014

Fall Bulbs

Now is the time for planting fall bulbs!  Bulbs and rhizomes are some of my favorite things to plant for multiple reasons:

1.  High ROI (Return on Investment) - bulbs and rhizomes multiply pretty easily, so you can continue to spread them around your garden, or share them with a friend

2.  They make great cut flowers - they last a long time in the vase

3.  They are relatively easy to grow

4.  They come in such a variety of shapes and colors

This year, I'm planting some classics, along with some new varieties.


Here I have:
  • Allium 'Purple Sensation' (10 bulbs)
  • Daffodil 'Trumpet Mix' (47 bulbs)
  • Daffodil ' Replete' (12 bulbs)
  • Daffodil 'Unsurpassable' (25 bulbs)
  • Ranunculus 'Bright Mix' (25 bulbs)
  • Tulip 'Queen of the Night' (25 bulbs)
  • Hyacinth ' Shades of Purple' (28 bulbs)
  • Hyacinth 'Orientalis Mix' (6 bulbs)
  • Lycoris 'Radiata' (4 bulbs)
  • Lycoris ' Aurea' (2 bulbs)
I also ordered some more bulbs online that I couldn't find in the stores:


Here I have:

  • Astilbe Bridal Veil (2 clumps of rhizomes)
  • Astilbe Younique Carmine (1 clump of rhizomes)
  • Narcissus Erlicheer (10 bulbs)
  • Oxblood Lilies (6 bulbs)
  • Tulip Clusiana Lady Jane (10 bulbs)
  • Ranunculus Pastel Mix (10 rhizomes)
  • Ranunculus Rainbox Mix (10 rhizomes)
  • Ranunculus Picotee Mix (10 rhizomes)
  • Oxalis Iron Cross - Good Luck Plant (15 bulbs)

I was able to plant most everything directly into the ground.  However, the Dutch tulips and hyacinths required a bit more TLC.  They both need to be chilled in the crisper of the refrigerator (and away from fruit, like apples, that emits harmful gases) for 6-8 weeks before planting so that they get enough chill hours here in Texas.  I knew this about tulips, which is why I haven't planted any yet.  However, I was not aware this was the case for hyacinths as well.  Last fall I had planted quite a few which had no problem emerging this spring.  Maybe we happened to have a chillier winter than normal?


I really don't like the fact that I have to treat the tulips and hyacinths as annuals.  The only annuals I usually plant in my garden are self-seeding plants that last all spring and summer (like zinnias!).  I'm really all about the ROI of the plants (that's my finance background for ya!).  But, the tulips came with a bulb pack that I just couldn't pass up, so I'll be giving them a go this year.  I can't stand the idea of throwing the bulbs away next year, but I'm also not sure that I want to go through the hassle of storing them for months as well.  Maybe my family in the north with get lucky and I'll pass the bulbs off to them.  Or, I'll really enjoy the flowers that remind me of the Midwest and be willing to put up with the extra work for the beauties.  I'll just have to wait and see.

Additionally, I had an amaryllis and some paperwhite bulbs sitting around from last Christmas when I forced the bulbs inside.  I really should have planted the bulbs outside at that point so that they could store energy all summer long for the next bloom season.  But, at that point, I didn't have anywhere to plant them outside, so they remained inside, in their original pots.  


They should have probably been thrown away since they have been sitting around so long, but I thought I'd give them a shot, to see if they have anything left.  What does it hurt?  I'm not expecting anything this year, but maybe they will surprise me next year.

Sunday, March 2, 2014

Gifted Bearded Irisis

A generous neighbor recently separated some bearded iris rhizomes that were descendants from her grandmother's plants, and gifted them to me.  She gave me about 30 plants, which I was excited to plant in my backyard bulb bed.


To plant around some of my other bulb plants, I had to split the 30 plants into two sections, one on each side of the bulb bed.


I'm excited for these new treasures to bloom, but it might take some time, since some of the cuttings were pretty small and will need time to grow.  My neighbor sent this picture to me, so I know the beauty that I have in store.


Wednesday, July 4, 2012

Canna Lily Surprise

When we first moved into our house, just over a year ago - July 2 of 2011, there were no flowers  to be found anywhere on the property.  Granted, last year there were about 70 days of the summer over 100 degrees, not to mention the house was up for sale with no one living there, so there wasn't really anyone to take care of the flowers if they had been present.


However, this spring, we got a nice surprise in the back yard when some canna lilies came up in the very back corner of our lot.  It seems like someone planted them there to hid some of the electrical boxes that are located back in the corner.  They are very beautiful, and better yet, they do not require any care from my part (I think they get enough water from being close enough to the neighbor's sprinkler system!).


Sunday, July 1, 2012

Spring Bulb Bed

Earlier this spring, I was at Costco and saw a large bag of about 50 spring garden bulbs for under $20.  It was a purple color mix of gladiolas, dahlias, and calla lily bulbs and I got very excited because it was one of my first gardening project of the year, and my first project at our new house.

I found a spot in the back yard along the fence that was sunny and would be a perfect place for some colorful flowers.  I definitely wanted the flowers to be in the backyard so that they would be protected from being eaten by the deer that come around our house every night.  The ground was very hard, and you can only go a few inches before hitting a layer of rock, but Jon was able to help me dig a large enough plot for the bulbs.

I planted the bulbs in mid-March and started to see the gladiolas pop up in a couple of weeks.  The calla lilies popped up a couple of weeks later.  The dahlias were the last to come up. I was worried they wouldn't come up at all, thinking maybe I watered them too much and that the bulb rotted.  Luckily, 3 of the 4 tubers ended up showing.
I loved all the different pinks, purples, reds, and oranges of the gladiolas, the lilac color of the dahlias, and the complimentary yellow of the calla lilies.


The spring bulb bed has died down recently during the extreme heat of the Texas summer days.  I'm looking forward to next spring when the bulb bed fills out even more and I can have even more beautiful fresh cut flowers for my home.